Homemade Cheesy Garlic Breadsticks: An Amazing Ultimate Recipe
Homemade Cheesy Garlic Breadsticks are a delightful addition to any meal. If you love the tempting aroma of fresh garlic and the rich, melting flavor of cheese, you’re in for a treat. Picture this: warm, cheesy breadsticks pulling apart effortlessly, each string oozing with gooey goodness. They’re not just a side dish; they are a culinary experience—perfect for pizza nights, family gatherings, or dipping into marinara sauce.
Imagine sinking your teeth into these incredible breadsticks, each bite filled with a luscious blend of garlic, cheese, and buttery goodness. Whether enjoyed with pasta, a salad, or on their own, Homemade Cheesy Garlic Breadsticks are sure to steal the show at your dinner table. In this article, we’ll explore why this recipe is a must-try and how simple it is to create these heavenly bites right in your own kitchen.
Get ready to impress your friends and family with this wonderful recipe that combines simplicity and flavor. Let’s dive deeper into what makes these Homemade Cheesy Garlic Breadsticks the ultimate comfort food!
Why You’ll Love This Recipe
Homemade Cheesy Garlic Breadsticks boast some amazing attributes that make them a beloved favorite. Here are some reasons why you will fall head over heels for this recipe:
1. Incredibly Easy to Make: With just a handful of ingredients, this recipe is perfect for kitchen novices.
2. Crowd-Pleaser: These breadsticks are universally loved, appealing to both kids and adults alike.
3. Customizable Flavors: You can add herbs, spices, or even different types of cheese to suit your taste.
4. Quick to Prepare: You can have these on the table in less than an hour, making them perfect for last-minute gatherings.
5. Versatile Serving Options: Enjoy them on their own or with dips like marinara, ranch, or garlic butter.
6. Freezable: You can freeze leftovers, allowing you to indulge in these tasty treats later!
These benefits establish why Homemade Cheesy Garlic Breadsticks should become a staple in your recipe repertoire. They’re not just food; they are an experience that combines warmth, flavor, and love.
Preparation and Cooking Time
Preparing Homemade Cheesy Garlic Breadsticks is efficient and quick. Here’s a breakdown of the total time needed to make them:
– Preparation Time: 20 minutes
– Cooking Time: 15-20 minutes
– Total Time: Approximately 35-40 minutes
This efficient time frame allows you to whip up a batch of these delightful breadsticks without spending all day in the kitchen!
Ingredients
– 1 package (about 2 ¼ teaspoons) active dry yeast
– 1 teaspoon sugar
– ¾ cup warm water (about 110°F)
– 2 cups all-purpose flour
– 1 teaspoon salt
– 2 tablespoons olive oil
– 3 cloves garlic, minced
– 1 cup shredded mozzarella cheese
– ¼ cup grated Parmesan cheese
– 2 tablespoons melted butter
– 1 teaspoon dried Italian herbs (optional)
– Fresh parsley, for garnish (optional)
Step-by-Step Instructions
Creating your Homemade Cheesy Garlic Breadsticks is simple and fun! Follow these steps for delicious results:
1. Activate Yeast: In a small bowl, combine yeast, sugar, and warm water. Allow it to sit for about 5 minutes until frothy.
2. Mix Dry Ingredients: In a large mixing bowl, combine flour and salt.
3. Combine Ingredients: Pour the yeast mixture and olive oil into the flour bowl. Mix until a dough begins to form.
4. Knead Dough: Transfer the dough to a floured surface and knead for about 5 minutes until smooth and elastic.
5. First Rise: Place the dough in a lightly greased bowl, cover it with a kitchen towel, and let it rise in a warm place for about 30 minutes or until doubled in size.
6. Prepare Garlic Butter: While the dough rises, mix melted butter and minced garlic in a small bowl.
7. Shape the Breadsticks: Preheat your oven to 425°F (220°C). Once the dough has risen, punch it down and roll it into a rectangle about ½ inch thick.
8. Cut the Breadsticks: Use a pizza cutter or knife to cut the dough into strips (about 1 inch wide).
9. Apply Butter Mixture: Brush the garlic butter mixture over each breadstick strip generously.
10. Add Cheese: Sprinkle shredded mozzarella and Parmesan cheese evenly over the dough.
11. Final Rise: Place the breadsticks on a lined baking tray, cover them, and let them rise for about 10-15 minutes.
12. Bake: Bake in the preheated oven for 15-20 minutes or until golden brown and bubbly.
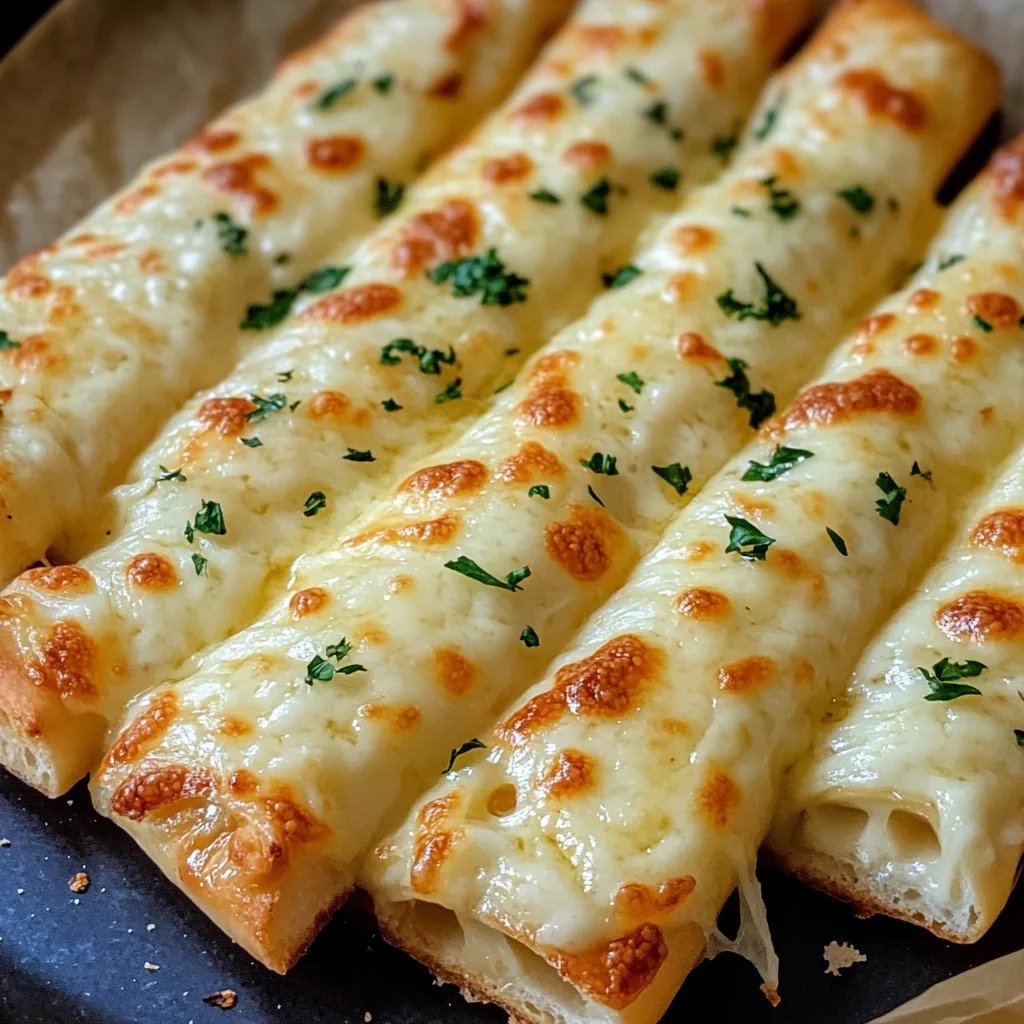
13. Garnish and Serve: Once out of the oven, brush with any remaining butter mixture, sprinkle dried Italian herbs if desired, and garnish with fresh parsley.
By following these steps, you can easily create Homemade Cheesy Garlic Breadsticks that are sure to impress!
How to Serve
Serving Homemade Cheesy Garlic Breadsticks can elevate your meal experience. Consider these ideas to create a lasting impression:
1. Presentation: Arrange the breadsticks on a beautiful platter for an inviting look.
2. Dipping Sauces: Pair them with marinara sauce, a spicy aioli, or even a creamy ranch dressing for added flavor.
3. Sides: Serve alongside your favorite pasta, salad, or hearty soup for a complete meal.
4. Garnishes: Add some extra freshness by garnishing with freshly chopped parsley or red pepper flakes for a pop of color and heat.
5. Creative Pairing: Make them a fun appetizer at parties, served with various toppings like jalapeños or roasted vegetables.
With these serving suggestions, your Homemade Cheesy Garlic Breadsticks will not only taste amazing but will also look professional and inviting on any table!
Additional Tips
– Use Fresh Ingredients: For the best flavor, use fresh garlic and high-quality cheeses. Fresh ingredients elevate the taste of your Homemade Cheesy Garlic Breadsticks.
– Experiment with Toppings: Consider adding toppings like chopped olives, jalapeños, or sun-dried tomatoes. This can add a unique twist to your breadsticks.
– Mind the Oven Temperature: Ensure that your oven is preheated properly. This helps achieve that perfect golden color and crispy texture.
Recipe Variation
Feel free to customize your Homemade Cheesy Garlic Breadsticks with these delightful variations:
1. Herb-Infused Breadsticks: Add fresh herbs like rosemary, thyme, or basil to the dough for an aromatic touch.
2. Spicy Garlic Breadsticks: Incorporate crushed red pepper flakes into the garlic butter for a spicy kick.
3. Cheesy Spinach Breadsticks: Mix in some fresh spinach or kale into the dough before shaping it. This adds a nutritious element while enhancing flavor.
Freezing and Storage
– Storage: Store any leftover breadsticks in an airtight container in the refrigerator. They will stay fresh for up to 3 days.
– Freezing: To freeze, wrap the breadsticks tightly in plastic wrap, then place them in a freezer bag. They can be frozen for up to 3 months. To reheat, simply bake in a preheated oven until warm.
Special Equipment
You will need a few essential tools to prepare your Homemade Cheesy Garlic Breadsticks successfully:
– Mixing bowls
– Measuring cups and spoons
– Pizza cutter or sharp knife for slicing
– Baking sheet lined with parchment paper
– Kitchen towel for covering the dough during rising
Frequently Asked Questions
Can I use store-bought dough?
Yes, you can use store-bought pizza or bread dough if you’re short on time. Just skip the yeast activation and mixing steps.
How do I keep the breadsticks from getting too hard?
Make sure to bake them only until they are golden brown. Overbaking can cause them to become hard.
Can I add different types of cheese?
Absolutely! Feel free to mix different cheeses like cheddar, provolone, or feta for a unique flavor profile.
What can I use as a substitute for olive oil?
You can use melted butter or another type of oil like canola or avocado oil.
How do I know when the breadsticks are done?
The breadsticks are done when they turn golden brown and have a fragrant aroma.
Conclusion
Homemade Cheesy Garlic Breadsticks are not just a delicious side dish; they’re a crowd-pleaser that complements a variety of meals. Their cheesy, garlicky allure makes them irresistible to both kids and adults alike. With this easy-to-follow recipe, you’re well on your way to creating a delightful experience for your family and friends. So go ahead and enjoy making these cheesy delights in your own kitchen!